Blackboard Announcements
Annoucement are an ideal way to post time-sensitive information critical to course success. Add announcements for these types of activities:
- Due dates for assignments and projects
- Changes to your syllabus
- Corrections/clarifications of materials
- Exam schedules
You can add, edit, and delete announcements from the Announcements page. When you add an announcement, you can also send it as an email to students in your course. Students receive the announcement even if they don't log into your course.
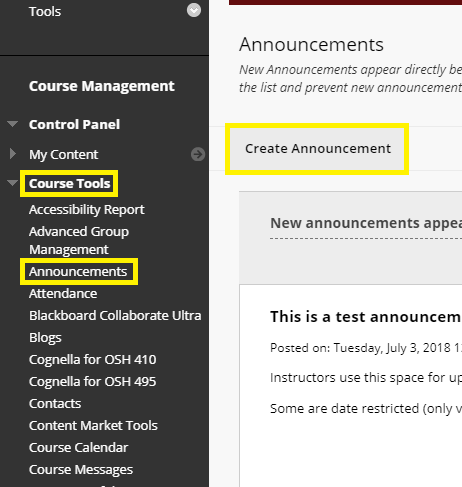
Create an announcement
- On the Control Panel, go to Course Tools > Announcements.
- Select Create Announcement.
- Type a Subject, which appeas as the title of the announcement on the Announcements page.
- Type your message.There are many formatting options, including adding images and links to videos. [Click image below to enlarge]

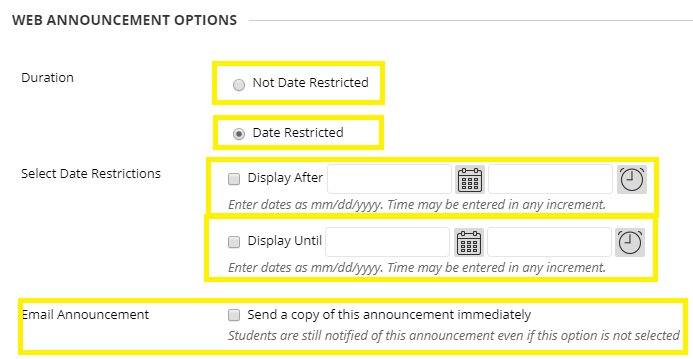
- In the Web Announcemetns Options section, youc an choose to restrict the announcement by date:
-If you choose Not Date Restricted, the announcement is visible until you remove it
-If you choose Date Restricted, select the Display After and Display Until check boxes to enable the date and time selections. Provide the date and time restriction settings. To display an announcement from a date forward, select the Display After check box and provide a date and time, but don't select the Display Until check box. Note: You can click on the calendar and clock to choose dates and times easier. - Select the Email Announcement check box to send students an email with the announcement. The email is sent to all students, even those who chose not to receive announcement notification through email. [Click image below to enlarge]
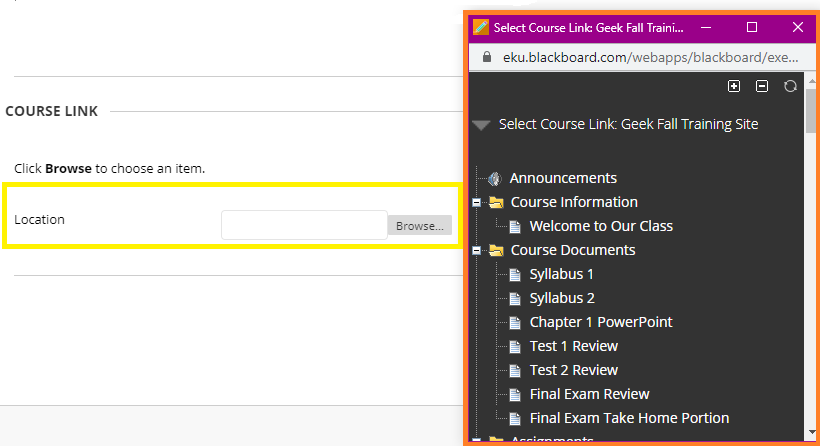
- Optionally, in the Course Link section, select Browse to link to a course area, tool, or item. A pop-up box will appear that you can choose items from. [Click image below to enlarge]
- Select Submit.
Most of page content taken directly from Blackboard site with a few tweaks and images from our specific version of the software
Contact Information
IT Service Desk
support@eku.edu
it.eku.edu
859-622-3000