Create Blackboard Threads
A thread is a conversation within a forum that includes the initial post and all replies to it.
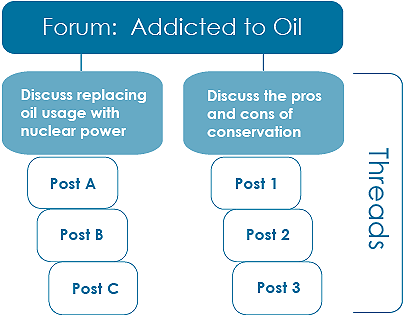
Example: You can create a forum that addresses a broad subject, such as "Addicted to Oil." Next, you create two threads containing the specific issues to be discussed, such as replacing oil usage with nuclear power, and the pros and cons of conservation. To ensure students post only to existing threads, consider disallowing thread creation in the forum settings.
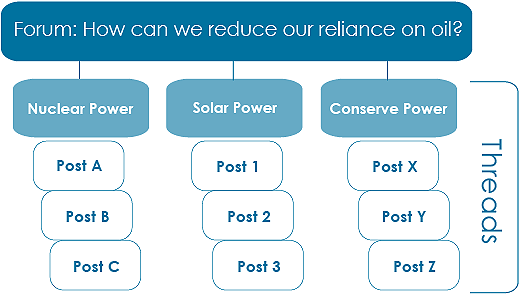
Example: You create a forum and ask a question or provide the instructions or details in the description, such as "How can we reduce our reliance on oil?" Then, students create threads for each solution to the problem of oil addiction. All members post to existing threads to comment on given answers or create new threads to present new solutions. In the forum settings, be sure you select the Allow Members to Create New Threads option.
If you enable thread grading, members can't create new threads.
Create a thread
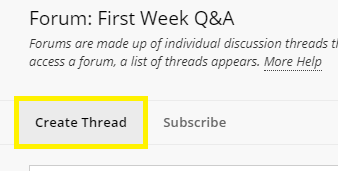
- On the Discussion Board page, open a forum and select Create Thread.
- The Create Thread page opens and the forum description is shown. This description is also shown when a user encounters a thread with the post first setting. Forum descriptions are often used as prompts for discussion, so they are now visible where users are posting.
- Type a subject, and instructions, a description, or a question.
- You can attach a file in the Attachments section. Select Browse My Computer to upload a file from your computer. You can also upload a file from the course's storage repository. If your course uses Course Files, select Browse Course. If your institution has access to the content management features, select Browse Content Collection.
Files uploaded by students aren't saved to Course Files or the Content Collection.
- If you chose to grade threads when you created the forum, you decide on a thread-by-thread basis whether to grade a thread and you'll see additional settings. In the Grading section, select the check box for Grade Thread and type Points possible. Select the check box for Show participants in needs grading status and select the number of posts from the menu. [click image below to enlarge]
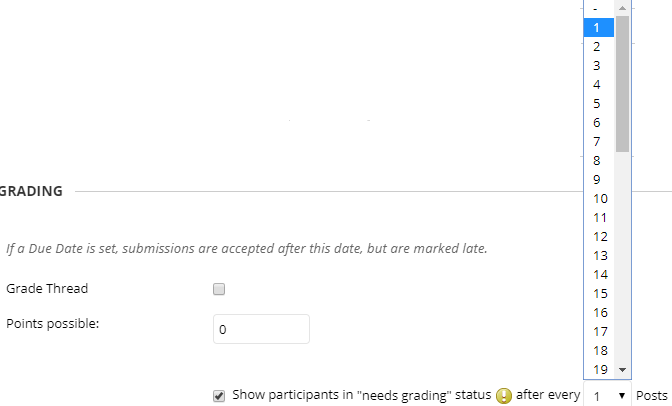
- This setting displays the Needs Grading icon in the Grade Center and places the posts in the queue on the Needs Grading page after users make the specified number of posts. If you select a grading option and do NOT select the check box, the Needs Grading icon doesn't appear in the Grade Center and posts don't appear on the Needs Grading page.
If you choose three posts from the menu and a user submits two, the In Progress icon appears in the Grade Center cell and the discussion board until the specified number of posts is met.
You can also associate a rubric to use for grading by pointing to Add Rubric.
- Select Save Draft to store a draft of the post or Submit to create the thread.
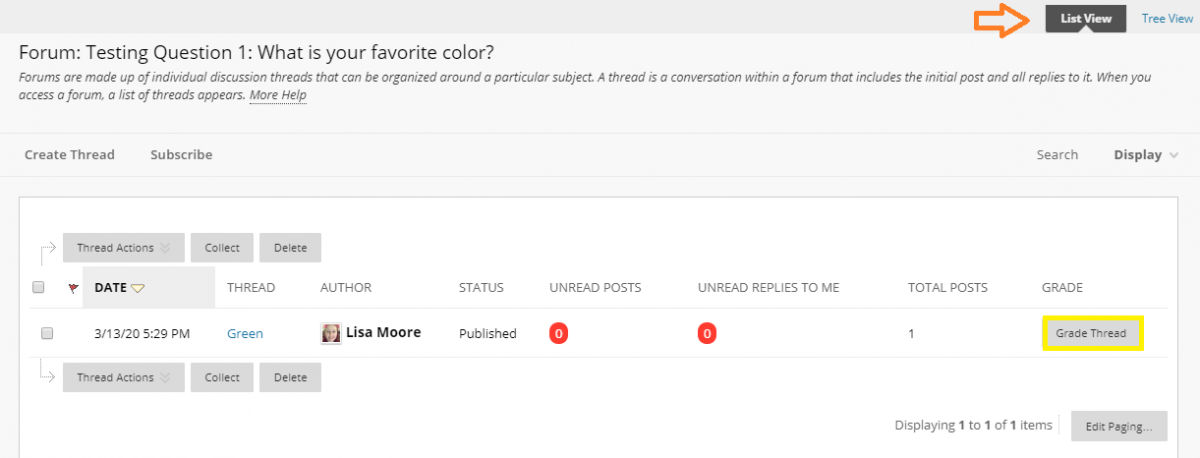
The newly created thread appears in the forum. If you enabled thread grading, two functions appear in the Grade column:
- Select Grade Thread to evaluate the posts.
- Select Grade to enable grading for a thread and assign a value.
[click image below to enlarge]
View a thread
When you view a thread, all posts and the thread description appear on one page. You can use thread descriptions to prompt users to participate in the discussion. Each author's profile picture accompanies their posts to help you easily identify authors. Use Expand All and Collapse All to manage the visibility of posts on the page. Point anywhere on the page and functions appear at the top, such as Search and Refresh.
The editor appears immediately after the message you're replying to. You can refer to any post on the page while you type your reply.

- Select the number of unread posts to view only those posts in a thread. Use the arrow buttons to navigate to other threads in the forum.
- If you enabled the rate posts feature in a forum's settings, Overall Rating displays the average rating for a post. When you point to the rating area, it changes to show Your Rating.
- Mark posts as read or unread. Blue icon = unread. White icon = read. Only expanded posts that you view onscreen are marked as read. Posts are not automatically marked read by quickly scrolling down the page. Select the icon to manually change the status of a message. You can also flag posts you want to review again later or indicate as important.
- When you view threads, a badge appears next to a forum manager or moderator's name. Point to the badge to see the user's course role and forum role. Custom roles are displayed if your institution uses them.
- Point to a post to see Reply, Quote, Expand/Collapse, and other available functions. Select Collapse to minimize a post. This increases the vertical screen space available for viewing posts.
- View relative dates for posts, such as "7 days ago." When you point to the relative date, you can view the absolute date of creation or editing, and the number of views.
When you create a forum, you can choose to allow members to start threads. Generally, the purpose of the forum dictates whether members can start threads. A moderated, graded forum used to evaluate student performance is usually tightly controlled and members can't create threads. Other forums are designed for members to share opinions and thoughts on topics. In this case, you might allow members to create threads and spark discussions.
To help organize your view, you can change the status of existing threads and determine which threads appear in a forum.
Instructors and students create threads in the same way. If you enabled grading, you can also set the thread to be graded.
Change a thread's status
You can change the status of a thread to keep students focused on relevant discussions and to help organize a forum that contains many threads. When a user creates and submits a thread, it's assigned the Published status.
- Publish: Make a thread available to all users.
- Hidden: Hide a thread from immediate view, but still allow users the option of reading the thread. Unneeded content is hidden from view, which helps users find relevant content. Users can't reply to or edit hidden threads even if you enable editing for the thread. Users can view hidden threads using the Display list.
- Make Unavailable: Hide a thread from all users' view except forum managers.
- Lock: Allow users to read a thread, but not edit or add to it. A locked thread allows you to assign grades without users updating or changing posts.
- Unlock: Unlock a locked thread to select another status.
You can change a thread's status in two ways. To change the status of one thread, you can select a status from the thread's menu, or:
- Open a forum and change to List View, if needed.
- Select the check box next to each thread you want to change. To select all threads, select the check box in the header.
- From the Thread Actions menu, select a new status for the selected thread or threads.
- The status for each thread appears in the Status column. If you save a draft of a thread to edit in the future, Draft appears in the Status column. To access your drafts, select Show All or Drafts Only from the Display menu.
Filter the list of threads
If you have many threads in a forum and assign different statuses to the threads, you can choose which threads appear in a forum. For example, if you start several threads and save them as drafts, you can choose to show only those drafts and select the threads to edit and publish.
- Go to the forum and change to List View, if needed.
- Point to Display and select the type of threads to view in the forum.
- The forum page displays only those threads that you selected.
Draft posts
You can use the Save Draft option if you need to return to your post at a later time. This function saves your comments and files on the page.
To access your drafts, return to the forum page and set it to List View. Point to Display and select Drafts Only to view the saved post.
Select the draft's title to open the Thread page. While you view your post, point to it to view the functions for Edit and Delete. Select Edit to open the editor. After you make your updates, select Save Draft again to update the draft or Submit to publish the post.